This past Saturday I spent finishing the kitchen & bath tear-out and spent time test placing the new power supply/converter and water heater.
I also pondered the plumbing and electrical requirements at length taking many measurements so that I can put it on paper prior to buying any supplies.
I've decided to go with PEX for all the fresh water and will utilize the push in type quick connect fittings. This system looks like it was made for inexperienced plumbers like me! We are not reinstalling a shower (literally folded the aluminum in half to remove it) inside the trailer and may purchase an outside "on demand" type down the road. We figure we will always be staying where a shower is near plus the one that was in the Fireball was TINY.
For plumbing I have the sink in the kitchen, hotwater heater, toilet and waste water to do... the black/gray tanks will need to be small so under 10 gallons for each is what we are planning. I do not anticipate any heavy usage because, again, we plan to stay mainly where there will be facilities to use.
The wiring of the power converter looks straight forward as well, the present wiring is in great condition although it is not plastic sheathed (Romex) type but early style sheathed in a metallic fabric. I've looked it over closely for burns, cracks and fraying and have found none so will leave it in place adding any new circuits as needed..
Placement of a battery box and the 12 volt wiring will take some planning; the batteries will need to be vented outside and accessible for maintenance... lighting, the 12V water pump, a stereo, furnace, water heater etc. will need to be wired so stay tuned-
Tools Explained:
Belt Sander- An electric sanding tool commonly used to convert minor touch up jobs into major refinishing projects.
Pliers- Primary use is for rounding off bolt heads; often used in the creation of blood blisters.
Pictures from the weekend of 11/20:
 |
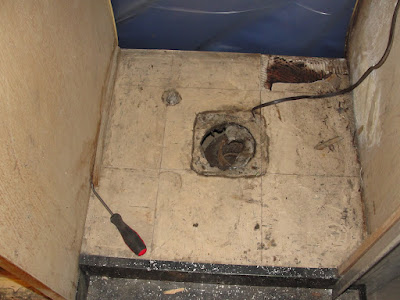
| Here we have the toilet "stall"...not very inviting -where do you put the magazines?! |
 |
| The shower stall is equally ugly and is coming out.... |
 |
| Of course it was installed and the cabinets assembled around it |
 |
| The tin floor must have been chilly - it laid right on top of the framing |
 |
| Lori's demolishen kit... |
 |
| Working under a tarp inside a shed in the NW winter is less then ideal - but I'm grateful to have it under cover |
 |
| Okay just the pan left...suffice it to say that the shower stall won't be reused for showers! I will use the aluminum to shore up the tin wheel wells later |
 |
| This is what greeted us under the shower pan - lotsa dirt |
 |
| Another view |
 |
| This is one of the best tools for the removal of rusty fasteners! |
 |
| This is the bath wall on the street side with old paneling removed |
 |
| Here is the location of the old water heater and where I plan to add the new one - the difference is that the original only worked with a hook up to shore power - new one is propane |
 |
| Some of the plumbing after a "remodel"... I think it's actually automotive heater hose they used for the city water hookup! YUK! |
 |
| Another view - hot/cold went from here to the sink |
 |
| Here is the customized water hook up - nice work Joe Bob! |
 |
| Underside where plywood was put in place of whatever was here before - this is gonna go and the black/gray water storage tanks will be mounted here |
 |
| The undersaide of Kat is in pretty nice shape - I'll wire wheel the frame and use a rust encapsulating paint prior to undercoating |
 |
This is under the kitchen area and is a drain for a water tank stored under the oven - yah I have no clue why
|
 |
Heres the tank from the top side - why is it located under the oven?
|
 |
| Here it is removed . it appears to be galvanized |
 |
| Anyone have a clue what it was for? I have a large cylinder shaped fresh water tank that we removed during the work on the front |
Some work on the kitchen area:
 |
| All the old Formica and trim removed |
 |
| The structure of the cabinets is very solid |
 |
| Heres a good view of stripped down kitchen area |
 |
And the bath with everything stripped out
New stuff for the old girl... |
 |
| This is the power converter I'll be installing |
 |
| AC/DC power and battery charger will be a great upgrade from.... |
 |
| ....this. |
 |
| Here is the main breaker box wiring which appears to be in great shape |
 |
| The new water heater will be nice... I plan to fab a front cover fascia that more closely matches the siding - maybe louvered hot rod style.... |
 |
| Placement of the water heater is just ahead of the old shower area |
 |
| Trying to place the new Suburban furnace will require some trial and error fitting- it takes up a lot of room compared to the original |


