Sunday, May 6, 2012

May 2012 Quick Update...

Well we are back at it after taking some time off. Katrina has been in enclosed storage since last fall, we decided to take a bit of a break and recover from the 14 month marathon of learning and working.

We started back in on her last weekend as the weather finally has warmed up... The Northwest winters seem to be longer and grimmer as time goes on!

Since the trailer is stored close to home now and is not an hours drive each way we will be working on her in our driveway... We plan to take her out mid June - reservations are made and we are travelin with friends so we better be ready!

Anyway here are the updates in the way of photos:

 Getting the plumbing in:


12 volt pump all mounted, I used the original aluminium water tank

I used PEX colored tubing, red for hot blue for cold and all the fittings are SharkBite - made the install painless - pretty much

The hot water heater, I installed a bypass kit for winterizing

Here is where the city water and stored water join... under the oven.  I'll post more photos as I do the kitchen sink, gray/black tank and  sewer  connections

Here is the pedestal for the toilet, tile installed and water run for toilet

Another view - I will have an access door in the front whee it is now open 


Just making sure that it all fits together, will disassemble for final install. Still scratching my head  about venting the black tank - I do not want to go all the way to the roof as it would look kinda tacky to run a vent pipe up the wall - any ideas?

Another view...yup all porcelain 

Putting the counter top down, I was able to get some of the last sheets of Aqua Boomerang from Formica prior to the discontinuation of the color 

There she is in my driveway - all the kids in the neighborhood love it ...so do some of their parents


Here is the kitchen as we fit the formica

My helper, pretty jazzed that her trailer is close to finally being done - inaugural trip is planned for mid June

It is nice and cozy inside

Still need to trim and cut out for sink & cook-top

That's it for now - more soon!

Wednesday, October 5, 2011

Quick October Update

We have been busy on a lot of small projects trying to complete her.  It 's been a bit difficult to devote the time to her but we inch ever closer to completion...


Here's the door, I re-skinned it and added the jalousie window c- looks and works great!

It seems I've been working on her forever...

Water heater installed as well as the power outlet - they both look better then I thought and i will be painting the  water heater cover to match

The curtains were made with black out cloth and it really works! Pitch black when shut even during the day, plust hey now offer great UV protection 

The water tank fill cap, I had it polished and it turned out great


The water storage tank all installed, we used turnbuckles and cable - Lori did a great job  fastening it down


I painted the fridge to match the "new" appliances - which are all powder coated aqua

So fitting the oven and cook top required some modifications - SURPRISE!!


With everything in the trailer gets quite warm for me while working so I bought a retro fan to use, it matches the theme perfectly and works amazingly well, really quiet and smooth, made in the USA back when we made the good stuff


I built a stand for the oven to rest on in the cabinet

Cabinet partially prepped for the oven


Stand installed....


I ripped this piece of wood in half to fill the gap at top and bottom, came from the bunk bed  frame so will match once shellacked 

I assembled the oven completely for a trial fit 

Looks great and has a lot more character then the original 

Same with the cook top, measure, cut, reinforce....

Here is the dinette area with cushions and curtains - everything is matching up nicely


I tried to get a photo without flash - it looks warm with all the colors coming together


Here is the counter area after I installed new plywood - I also added the retro aluminum edge trim.  I'll be installing Aqua Boomerang Formica next.  The table I am planning to build will also have the trim and Formica to match.

A few more views without the flash

You can also see the vintage style fan here (the exhaust fan in the wall behind the cooktop), from the great folks at Vintage Trailer Supply

We are very happy with the results

My very good friend Jim Anderson did a fantastic job on the upholstery and curtains

With flash gives an idea of the color


Table will be next for inside, after counter and hooking up appliances, testing the propane stuff will be fun...

Tuesday, September 13, 2011

Before and After - Plus Some New Stuff

Thought I would give some perspective on how far we've come with Katrina, the One Year Anniversary for her restoration was Labor Day weekend.

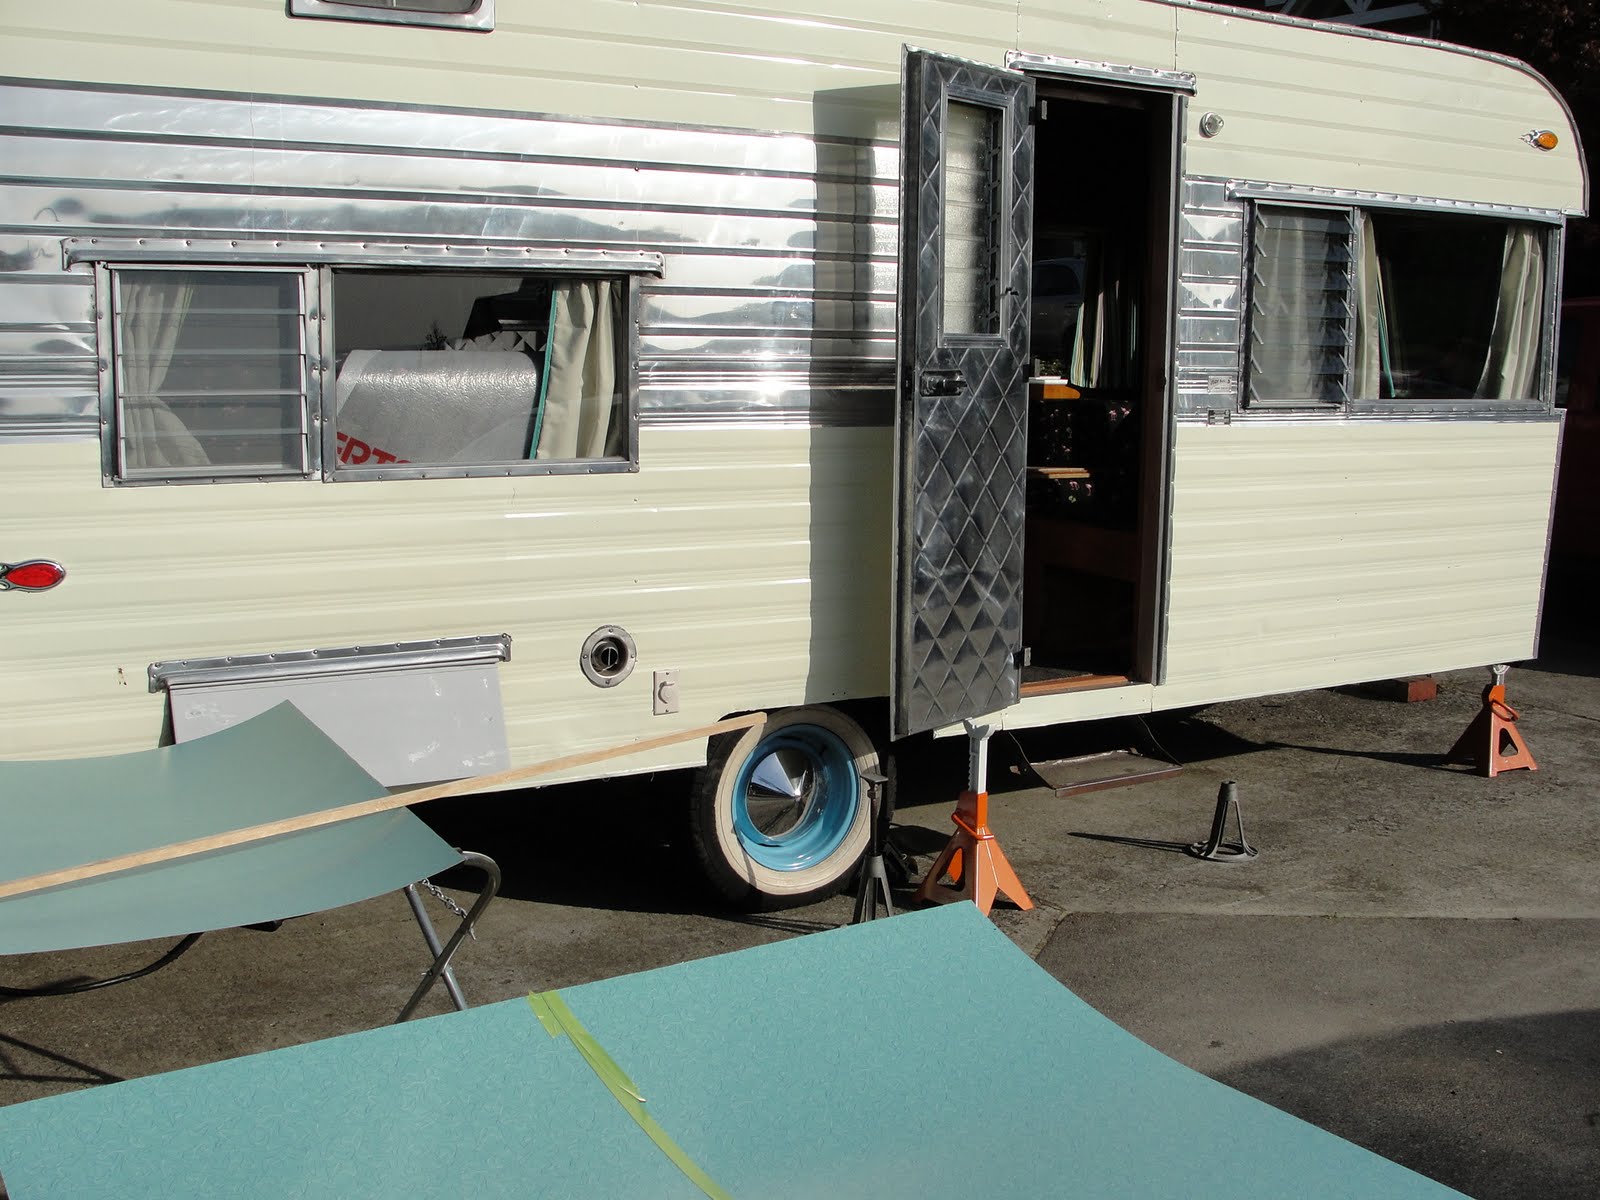
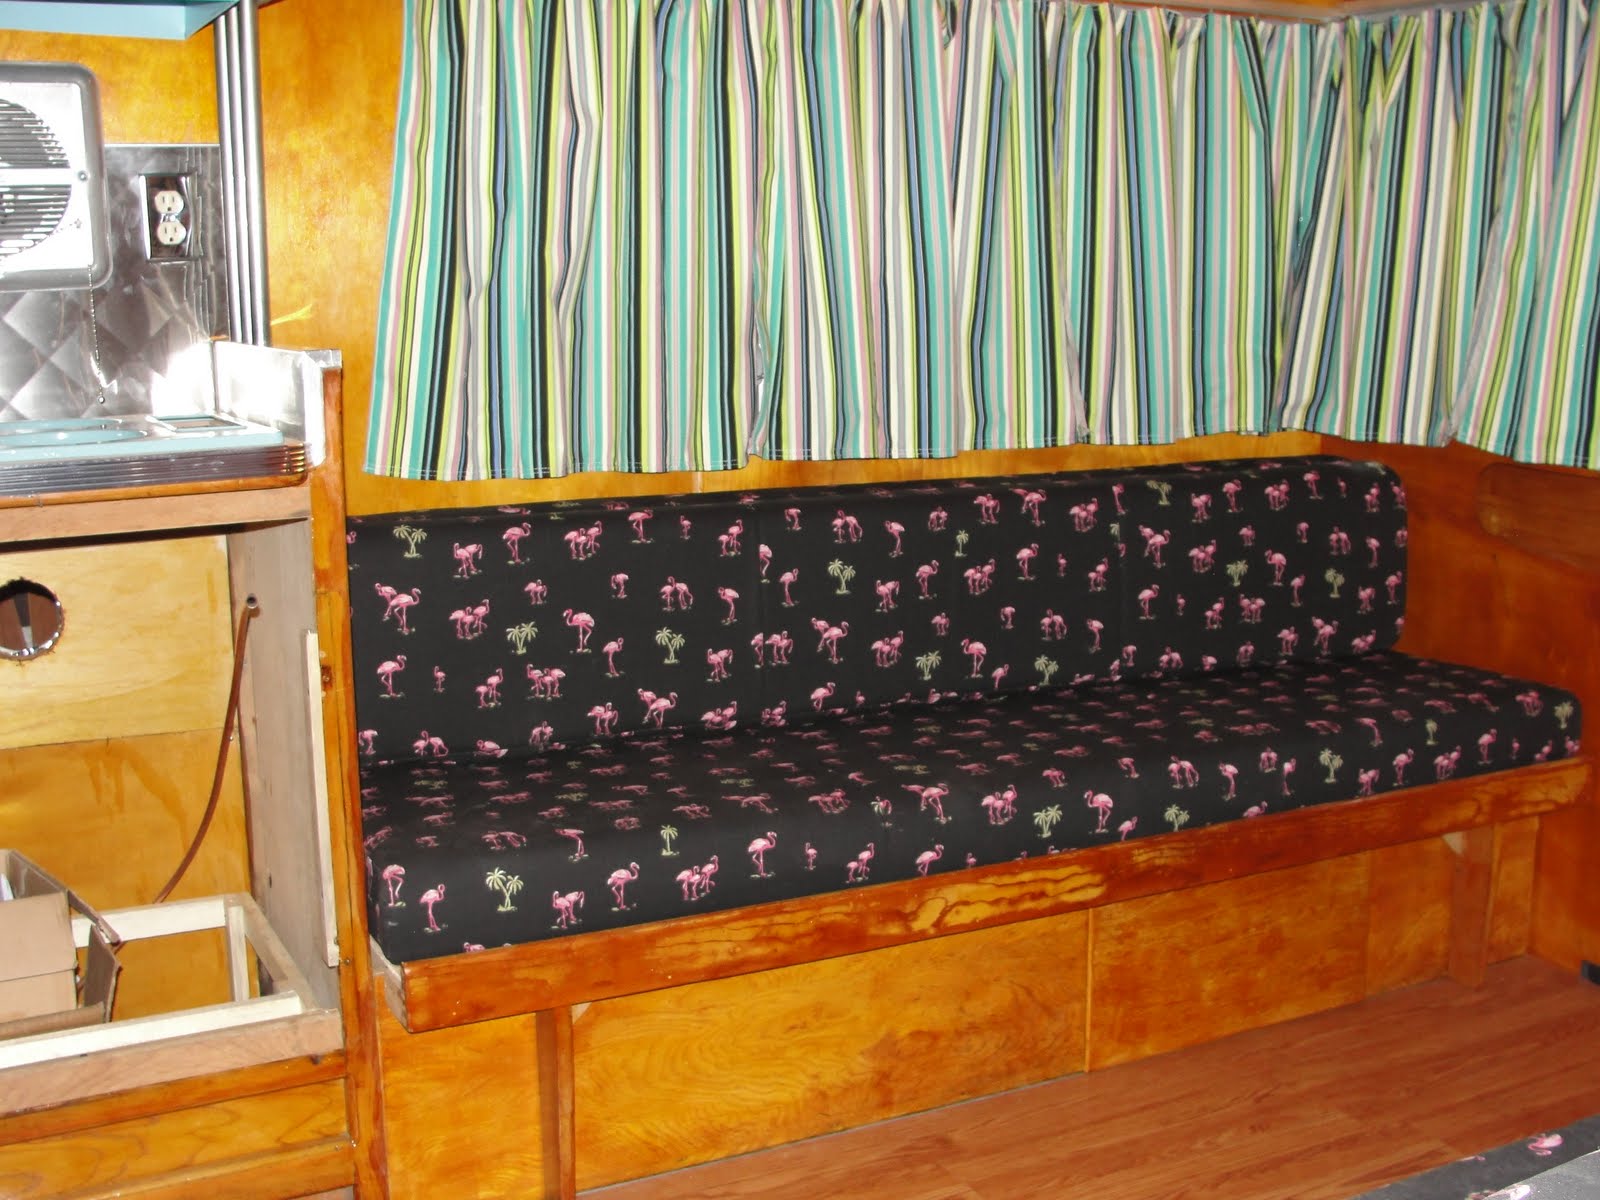
We are so very close to an inaugural run! I rebuilt the entry door; new skin and fabricated a Jalousie window... Curtains are done, Jack knife sofa is done, floors done, Furnace installed ( had to rebuild the sofa base to accomplish this) so whats left? Plenty! Here is a short list:

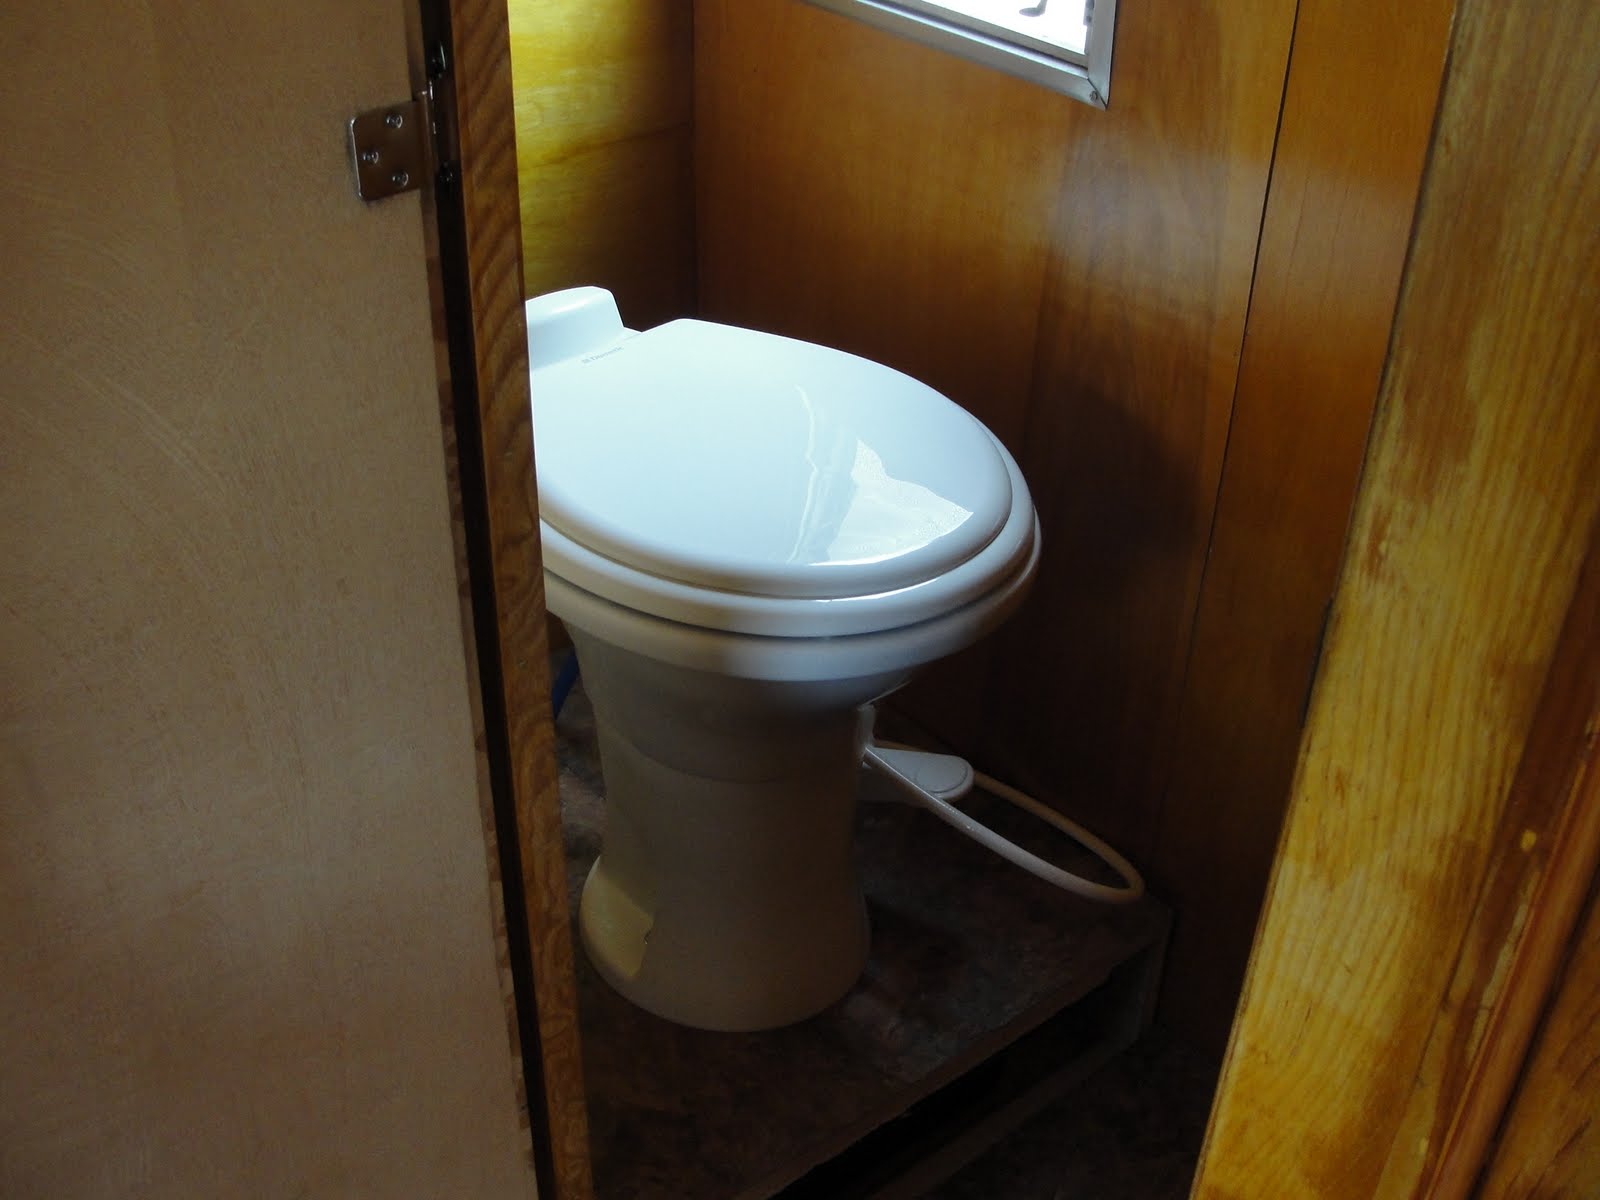
1. Plumbing, install toilet and 12volt pump - install and plumb gray/black water tanks
2. Install Gas appliances
3. Build & install table
4. Counter tops
5. BRAKES - inspect - rebuild as required
6.Clean frame and treat, undercoat
7. Liquor Cabinet
8. Vent refrigerator and toilet
9.Trim and cabinet interiors
10. Build bumper
11.Who knows... but I am sure there is more

Seems so long ago....just over 12 months


Here she is all painted up! Who says you can't polish a turd?
I had no clue just how dirty and deteriorated she was!


Bright and clean, almost as new

Shheesh Lori what were you thinking!

I guess we had a vision.... let's not let that happen again!

She was on her way to "Hunting Camp" if we did not save her...why does she fight me so much? :-)

I have the original Trail lite license plate light all polished up...

UGH!

AHHHH!

Filthy does not even get close....

Nearly there!


The bunk-beds were kinda cute but would be useless to us

Here is the Jack knife sofa all done - this will get some use!

Don't ya love the soap dispenser?

Although not installed you can see the appliance color here, the same color as the sink. Also have Aqua Boomerang pattern Formica to install 

The Fan is now in too, the original style from Vintage Trailer Supply - it is where the small hole on the right was - behind the cook top area


This is the original door, I added the window (which I cut down to fit) and had a new skin made for the outside...it was beat to hell - looks new now


This shows the 3" brake pattern I chose for the skin, rectangular mark is for the  Bargman  L66 handle

Window will add to the appearance and ventilation....I cut 14" off of it to make it fit, rebuilt/polished it - work like a champ too! not bad for a rookie!

This trailer had no 12 volt system at all - I added the power inverter/converter and  wired interior/exterior  lights, the furnace, refrigerator, water pump etc. Here is the battery box on the fabricated mounting bracket I made

Looks pretty good even if I say so myself

A night view all lit up!