Saturday, December 18, 2010

Framing and fitting in the potty

I decided to start with framing in the rear on the street side; this is where the toilet/shower are located. I always try to do what I think will be the most difficult repair first and since I need to figure out the holding tanks and plumbing this seemed to be it.

I can't be certain but believe that this trailer never had holding tanks for waste water; although that seems improbable. We plan to leave the shower out but want a toilet for obvious reasons...I am putting in a very small black water tank due to dimension constraints and the fact that I hope we do not use the toilet often. I've got it sorted out in my head and will test fit everything to see if "reality" matches my thinking... (uuhh yeah right!).

After doing all the re-frame work on the front the rear is coming fairly easily. The big question mark for me was how best to replicate the curvature at the top and bottom.  In looking at everything my idea is to cut solid pieces from 3/4 inch plywood and laminate them together - meaning that I will have a continuous curved "stud" on each side rather then several pieces fitted together.  I'll use the cabinet in the rear for a pattern as it has the radius cuts at top and bottom that are needed to accurately reproduce the lines.  

Here are some photos of progress the past couple weeks...


Amazing how every corner and both the wheel wells rotted


This is one of the curve cut 2x4s in the wheel opening, look at the staples that were used in 1959

A bit blurry but you can get an idea of the water damage on the rear lower area


Another view - plus check out the old wire for a TV antenna, they musta been living large in this trailer!

Looking down from the mid point...


The white Styrofoam in the background is the water heater 


Why is it called "dry rot" anyway? 


With all the old framing removed....

I had already beat the plywood out that had been attached from underneath with about 200 roofing nails... 

Here is the area with both floor 2x2's cut out

I considered sealing the bad wood with resin but decided that I'm too far into it to start taking shortcuts

I took the old "outer" stud out all the way to the front of the wheel 


Here you see the new wood and wheel cut outs all installed. The OE dimensions make fabricating a challenge - particularly when you do not have a pattern to copy... 

Overall it came out nice - much stronger that is for sure


Splicing the old and new together - lotsa heavy duty construction adhesive and #10 screws

I switched from wood glue to this (duh!) its stronger, bonds faster and waterproof

The fiberboard behind the new wood will be replaced from inside the trailer


Here we have the "main" inner/outer studs installed; I used 1/4" shims between them to replicate the paneling and will fill this in with fiberboard and adhesive

Looking good!

You can see most of the completed work in this photo


I re-framed this area since taking the pictures- rectangle is the bath window


Inside looking out

This is where the potty will sit

That is it for now...I plan to fab the "radius" studs for the back wall over this coming weekend...keeping my fingers crossed!

Old black water keep on rollin', Mississippi moon won't you keep on shinin' on me.... It's a Doobie Brothers song for all you youngsters; I thought it fitting for these next group of pics...


Remember this? You can see where the water inlet hole is filled - with plumbers putty!

I nearly ripped this apart during the deconstruction of the rear but it's solid so I'm gonna reuse it

No water damage on the underside

The black water tank that I bought from my friends Brittany and Jay - thanks guys it's perfect!(well almost)

The size was made for my application - although its only 9-10 gallons it will serve it's purpose for those midnight urges

I used a hole saw to enlarge the putty filled hole to use for the vent pipe (which I've not fully figured out yet)

Perfect size

Here I've reassembled the tank with the foam insulation

Wow! I was pleasantly surprised by the good fit

I'm going to get a scrap of linoleum for the top 

Okay so it was going soooo smoothly! The drain is located on  the inside and when I test fit it hit on the floor - no problem I thought until I went to cut an access hole, the steel frame rail is located right below the drain location! I turned the whole assembly around and it fit perfectly so I am going to relocate the vent (seen here in the front) to make it work. An update later...

Thursday, December 16, 2010

Planing and Ripping.... Making Dimensional Wood....

I've been working on the trailer only 1 day and an evening or two each week as the weather is cold and wet... I covered the trailer with plastic and then a tarp to keep the water leaking into the shed away but still I worry about the moisture in the air. It seems fine but I am anticipating the weeks of cold sunny weather typical in January so I can pull her outside and weather proof the shed a bit.

So as I rebuilt the front of Katrina it became abundantly clear how inferior lumber is today as compared to the 50's when this trailer was manufactured. Because all the original 2x2 and 2x4 framing is nearly 1/4" larger then what is available now the front of our trailer is 5/8" narrower then original.  That really isn't much but was enough to require a lot of trimming to fit original parts back in...it will be interesting to see what affect it will have when I reinstall the outer skin.

So I "invested" in a sizing planer and bought some reclaimed rough cut 2x4's from a building material recycling center.  Then I planned them down and ripped them to the proper dimension.  The wood is clear and really too beautiful to use as framing material... The cost for 5 2x4's (with nails and some imperfections) was less then the big box variety which I don't ever plan to use again.

Here are the photos....

The Planner I bought...nice and adequate for my use

I used the hose from my shop vac to deposit the sawdust outside

Well most of the sawdust anyway; I planned off 1/16th of an inch at a time

After planning all the boards down to the same dimension I ripped 3 of them into 2x2's 

Here's the lumber I bought, I think in all 5 boards there were a total of 2 or 3 knots

It was fun to do this...much easier then any car body work I've ever done (and I've done a lot!)


Finished 2x2's - smooth and the perfect size to match the original

Beautiful lumber like this is impossible to buy now

The wood was much more dense then new wood as well, my table saw was working hard to rip these!


I
I could see planning some 2x4s and laminating them together to make a table....HMMMMM


Next up I'll be using some of this wood to frame the rear and starting my work on the Black/gray water holding tanks 

Tuesday, November 30, 2010

More Kitchen and Bath "disassembly" & Appliance Placement


This past Saturday I spent finishing the kitchen & bath tear-out and spent time test placing the new power supply/converter and water heater.

I also pondered the plumbing and electrical requirements at length taking many measurements so that I can put it on paper prior to buying any supplies.

I've decided to go with PEX for all the fresh water and will utilize the push in type quick connect fittings.  This system looks like it was made for inexperienced plumbers like me! We are not reinstalling a shower (literally folded the aluminum in half to remove it) inside the trailer and may purchase an outside "on demand" type down the road.  We figure we will always be staying where a shower is near plus the one that was in the Fireball was TINY.

For plumbing I have the sink in the kitchen, hotwater heater, toilet and waste water to do... the black/gray tanks will need to be small so under 10 gallons for each is what we are planning.  I do not anticipate any heavy usage because, again, we plan to stay mainly where there will be facilities to use.

The wiring of the power converter looks straight forward as well, the present wiring is in great condition although it is not plastic sheathed (Romex) type but early style sheathed in a metallic fabric.  I've looked it over closely for burns, cracks and fraying and have found none so will leave it in place adding any new circuits as needed..

Placement of a battery box and the 12 volt wiring will take some planning; the batteries will need to be vented outside and accessible for maintenance... lighting, the 12V water pump, a stereo, furnace, water heater etc. will need to be wired so stay tuned-

Tools Explained:


Belt Sander- An electric sanding tool commonly used to convert minor touch up jobs into major refinishing projects.
Pliers- Primary use is for rounding off bolt heads; often used in the creation of blood blisters.

Pictures from the weekend of 11/20:

Here we have the toilet "stall"...not very inviting -where do you put the magazines?!

The shower stall is equally ugly and is coming out....

Of course it was installed and the cabinets assembled around it


The tin floor must have been chilly - it laid right on top of the framing

Lori's demolishen kit...

Working under a tarp inside a shed in the NW winter is less then ideal - but I'm grateful to have it under cover


Okay just the pan left...suffice it to say that the shower stall won't be reused for showers!  I will use the aluminum to shore up the tin wheel wells later 

This is what greeted us under the shower pan - lotsa dirt 

Another view

This is one of the best tools for the removal of rusty fasteners!

This is the bath wall on the street side with old paneling removed


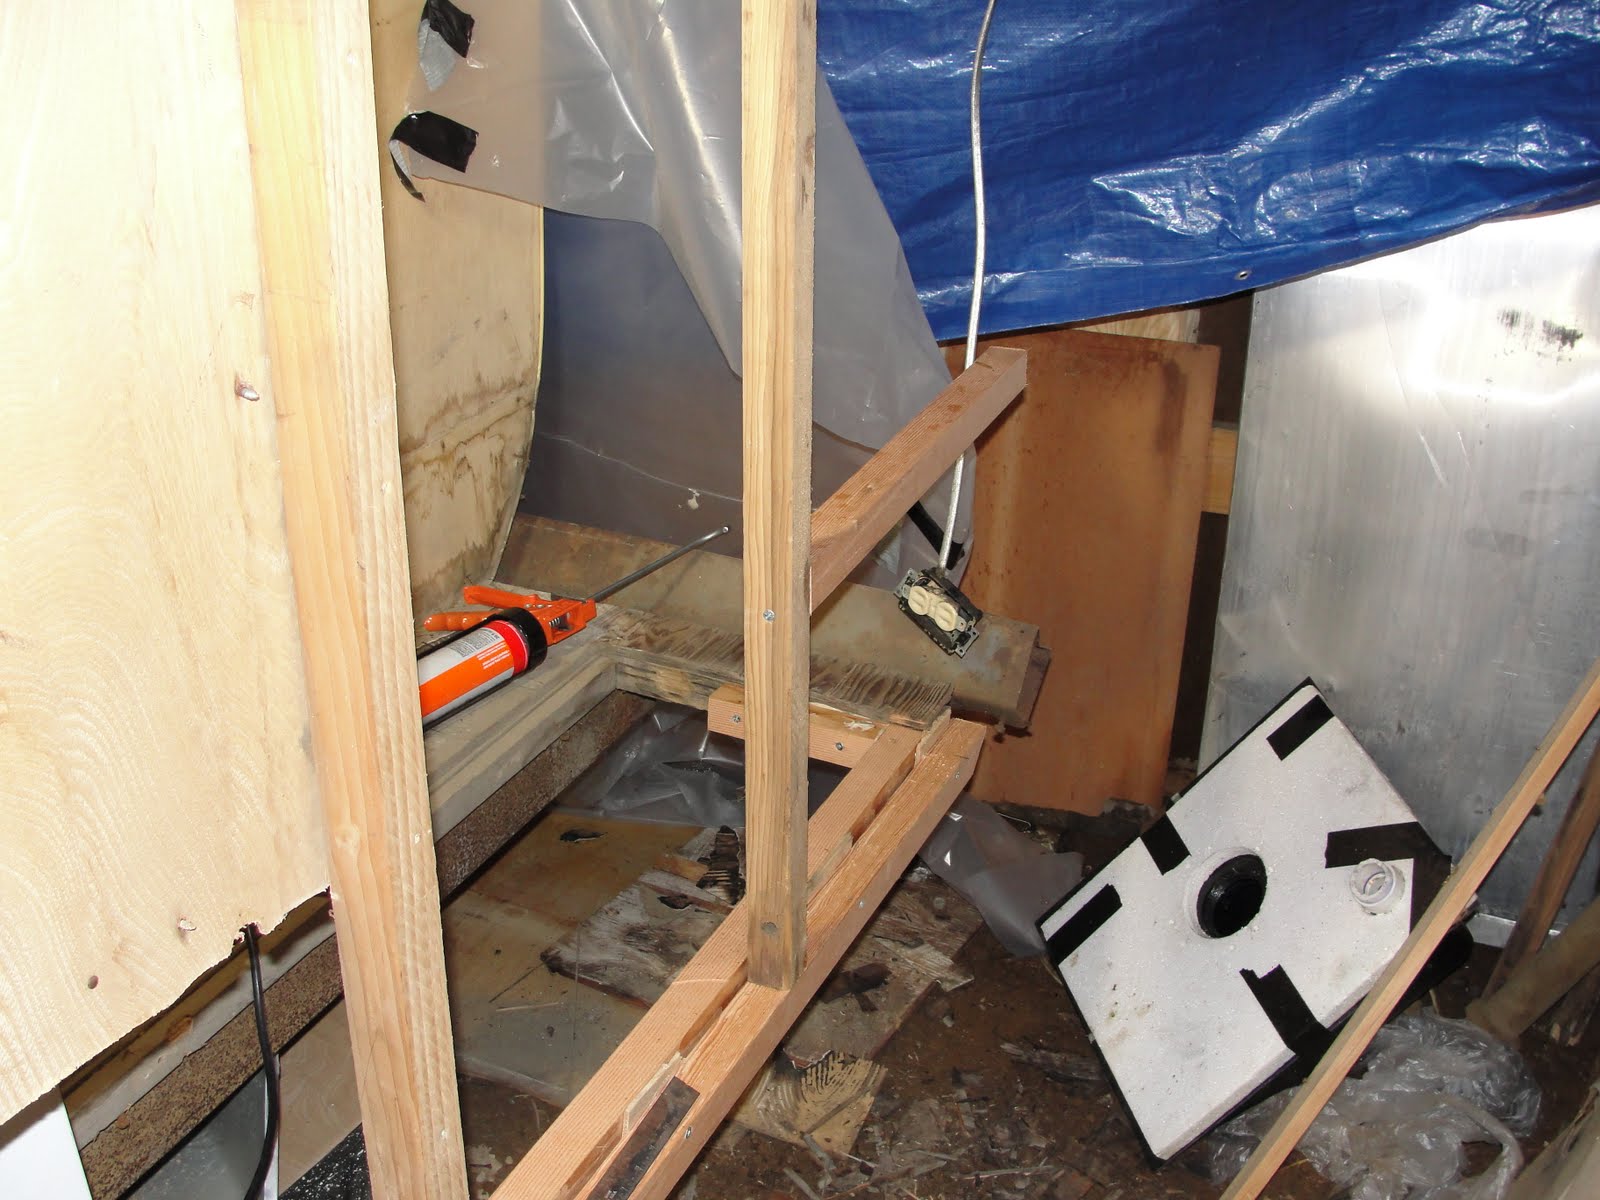
Here is the location of the old water heater and where I plan to add the new one - the difference is that the original only worked with a hook up to shore power - new one is propane

Some of the plumbing after a "remodel"... I think it's actually automotive heater hose they used for the city water hookup! YUK!

Another view - hot/cold went from here to the sink

Here is the customized water hook up - nice work Joe Bob!

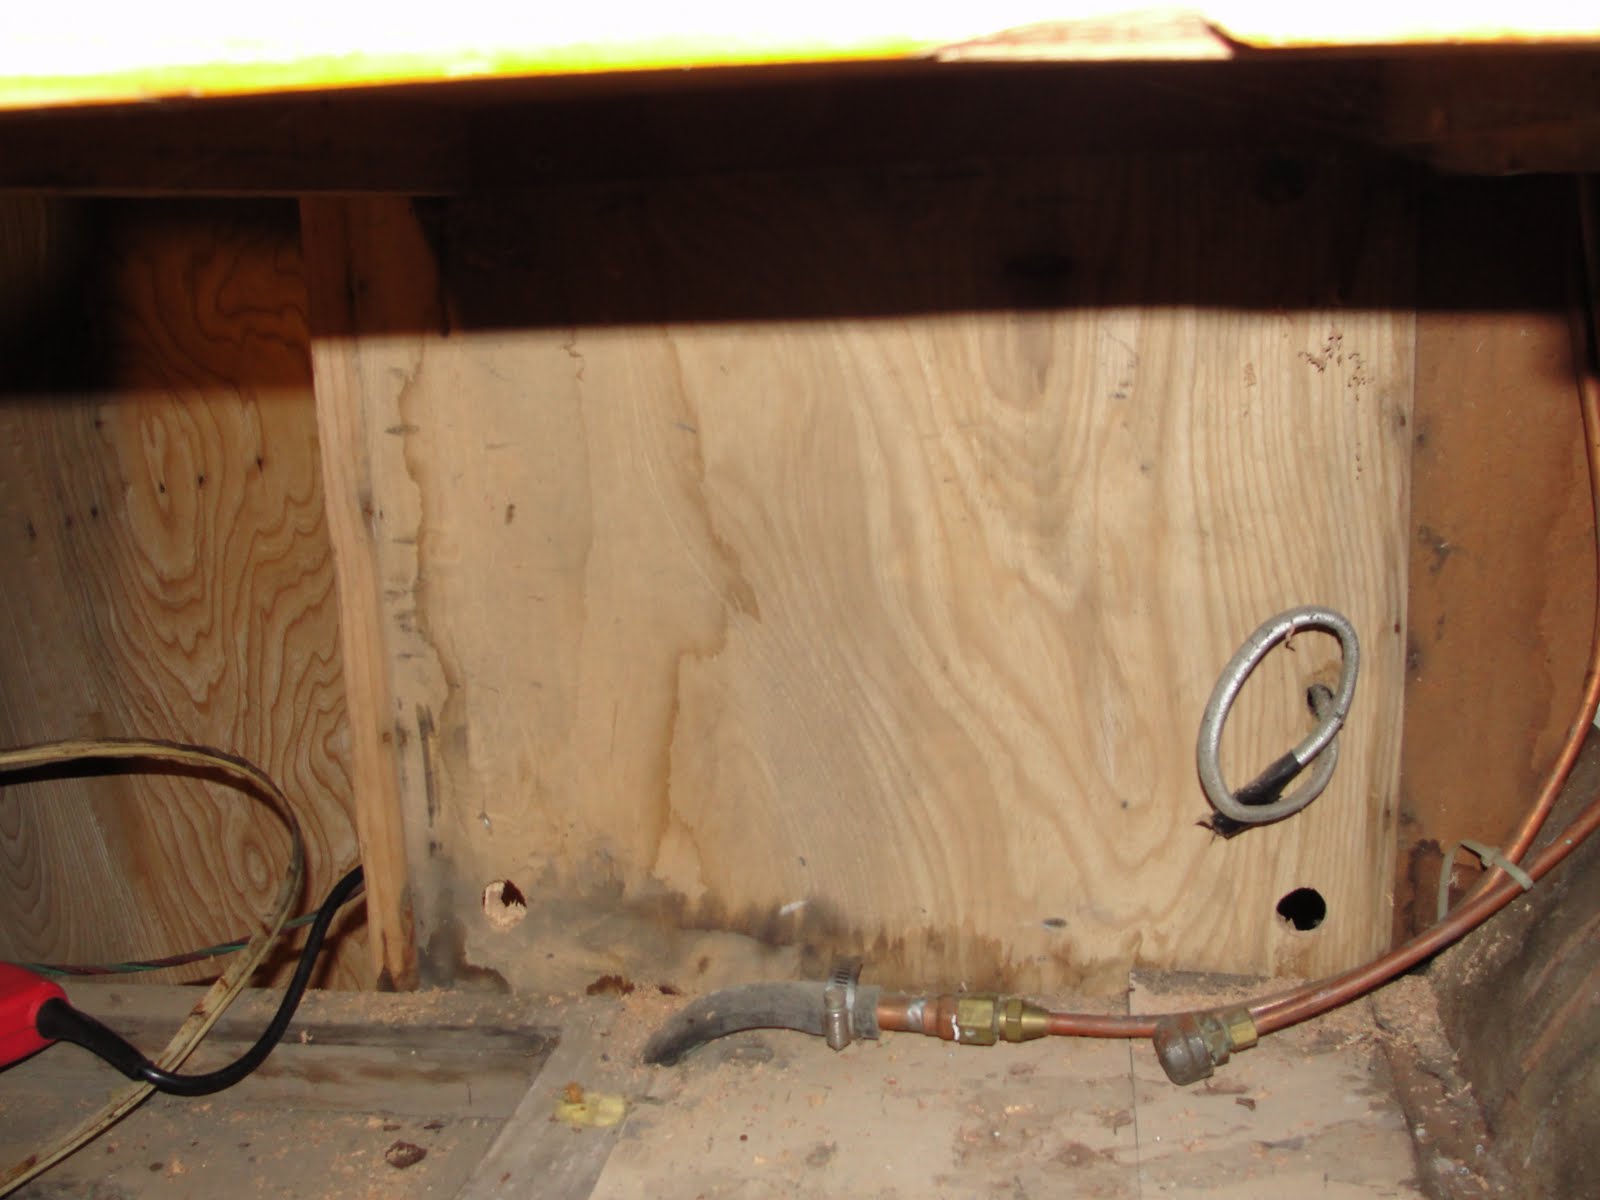
Underside where plywood was put in place of whatever was here before - this is gonna go and the black/gray water storage tanks will be mounted here


The undersaide of Kat is in pretty nice shape - I'll wire wheel the frame and use a rust encapsulating paint prior to undercoating 

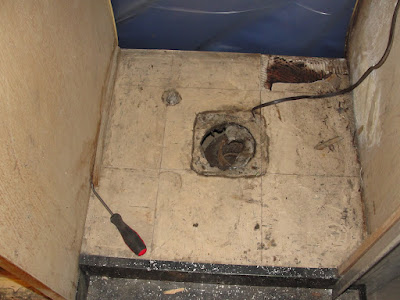
This is under the kitchen area and is a drain for a water tank stored under the oven - yah I have no clue why

Heres the tank from the top side - why is it located under the oven?

Here it is removed . it appears to be galvanized

Anyone have a clue what it was for?  I have a large cylinder shaped fresh water tank that we removed during the work on the front
 Some work on the kitchen area: 
All the old Formica and trim removed

The structure of the cabinets is very solid 


Heres a good view of stripped down kitchen area
And the bath with everything stripped out
New stuff for the old girl...

This is the power converter I'll be installing
AC/DC power and battery charger will be a great upgrade from....
....this.


Here is the main breaker box wiring which appears to be in great shape

The new water heater will be nice... I plan to fab a front cover fascia that more closely matches the siding - maybe louvered hot rod style....

Placement of the water heater is just ahead of the old shower area

Trying to place the new Suburban furnace will require some trial and error fitting- it takes up a lot of room compared to the original