Tuesday, August 23, 2011

Katrina Gets Paint!

Lots going on....so much that we have been spending weekends in a Motel near the shop. It's an inexpensive old place but we enjoy it and the restaurant next door as well as  being close to the trailer. The Kalama River Inn has been around since 1955 and boasts an Elvis stay back in 1962 while he was en-route to the Seattle Worlds Fair - with pictures to prove it.  We did stay in the "Elvis Room" and talked about how down to earth even famous people were back then - can you imagine any "star" of today staying in a place meant for mere commoners like us?

Anyway about Katrina...

We have been furiously working to get paint on Katrina, so many "little" projects to complete prior to spraying the paint. As much as we would love for her to be perfect she will not be winning a Ridler award that is for sure. So many dents and dings in the skin that we just decided to sand the filler that we applied and paint. Otherwise it would be another month of repair work for not much better result - don't get me wrong she looks great and will look even better after I do the Turquoise highlights this weekend.

Lori is such an amazing worker! She hates ladders and heights but decided that she would get on the roof to apply the Eternabond RoofSeal tape  (which she also found online and told me about).  This stuff is great! She cleaned all the seams and vents on the roof and applied the tape - DONE! No elastomeric paint to apply, what a time and mess saver! She (Lori) is my pride and joy and I appreciate her so very much.


There's my girl! Even though she hates it she is up there fixing the roof seams.

She accomplished cleaning and applying the EternaBond tape in one LONG evening while I prepped  for paint

Before and after, this stuff is great!

Here she is sanded... I should have stripped the paint while the panels were off as I originally intended

Most of the paint got sanded off - which is a lot more work then stripper

The back all ready and polished too

Masked up and nearly ready to spray

We took our time and made sure she was clean prior to masking

The orange tape is vinyl to leave a nice sharp line between the painted and polished areas 

Very little original finish remains

Up and down the ladder all day, who needs a gym?

We rigged temporary light in the shed for spraying which worked out great

Nothing fancy but it turned out really good - no dirt in the paint at all

There she is again, we cleaned it three times with wax and grease remover and then once with  anti-static

First pass spraying the sealer

I used a shield the first time around but it fogged up

Each time around the trailer took about 45 minutes - I applied one coat of sealer and two coats of color 

It was pretty uneventful although quite a workout - I managed to get the paint down flat with no dry edge

Overspray was not too bad

The paint and sealer went on nicely - I bought it on eBay and it was a bargain. Great  paint too!


My inexpensive Sharp HVLP gun worked just fine

Although the paint comes with hardener/reducer I thinned it an additional 10% as I used low air pressure due to my compressor size - these are the reducers I used

Here's the paint I bought, I'll use it again as it seems to be very good quality - especially for the price

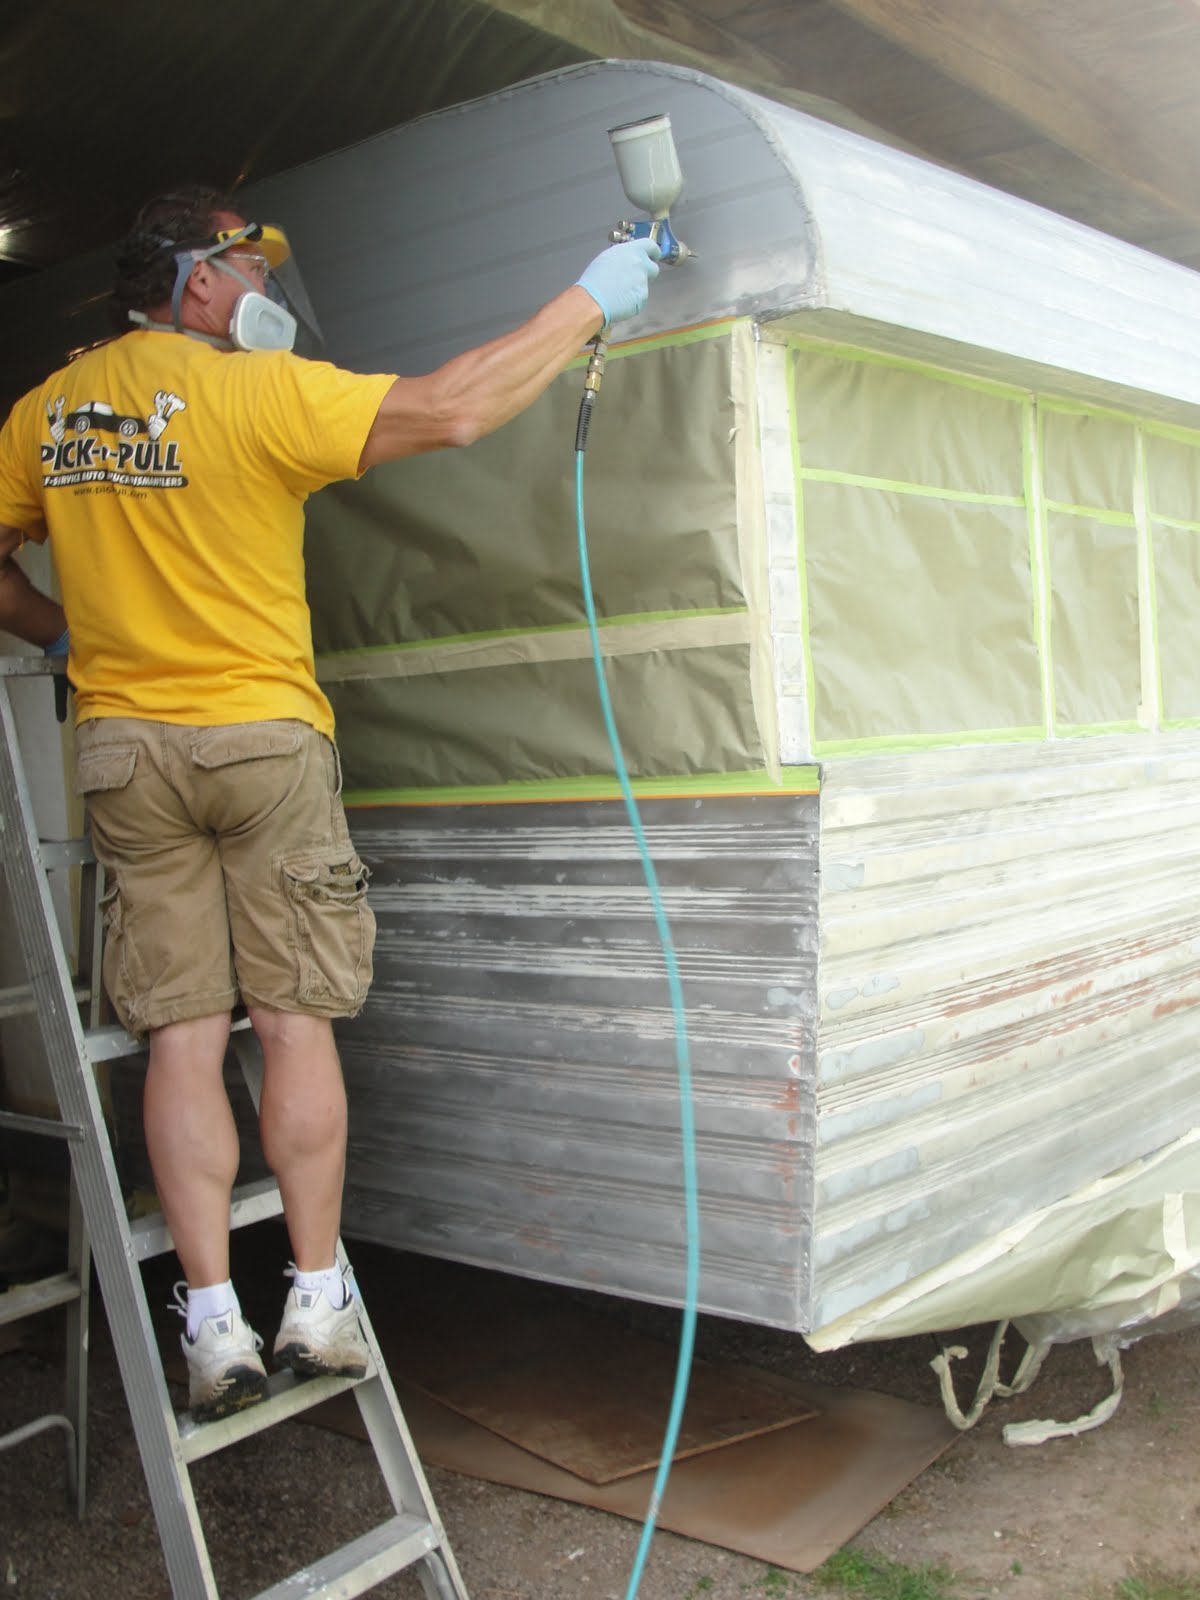
Applying the first color coat WOO HOO FINALLY!


It was WORK getting around her 

Lori assisted by making sure my air hose did not get in the way or tangled

My compressor barely kept up but it all worked out 

First coat all done
 
All done!  This was a great day!

I pulled some paper back after cleaning up - the paint had flashed off and I was anxious to see the contrast  against the polished aluminum

We left for a few hours and returned to unmask it completely 

We are very happy with the results 


I am looking for a bumper with some character, I do not want the square tube type and will buy an Airstream style sewage hose storage holder  
 
Well I guess I've got to finish restoring the windows now... That's next up window install and turquoise paint stripe


Sunday, August 14, 2011

Coming Together - August 2011


Okay we keep thinking we are near the end of the road.... it's just what I've been  saying all along; everything takes way longer to do then we think that it will.

We have not been taking as many of the step by step photos as we were only because we have been working non stop to get it finished.

Here is a list of what we have been doing:

  • Stripping and polishing the skin, scrubbing, using stripper and sanding each section
  • Filling dents and dings
  • Lori scrubbed the roof while I polished the skin,  both dirty time consuming jobs
  • Sealing and securing the skin, Vulkem sealer was liberally applied and we "stretched" the skin in places to make it fit,  body work started using finishing type body filler, prime & paint soon! 
  • Paint is single stage automotive urethane, cream base to start, will be adding second color after windows are installed
  • Running all new 7 way wiring from front to back, new hangers for the loom, soldering and heat shrinking every connection, wiring all new LED lights, tail lights will be housed inside OE Bargman #99 lenses to look authentic, installed ground lugs for positive grounding
  • Lori finished the whole interior shellacking, she is a great student and allowed me to show her how and did an amazing job - no surprise there!
  • Fabricated a new door threshold out of the shower stall aluminum
  • We've been filling all the gaps and spaces with spray foam insulation, will also use fiberglass resin on any exposed wood and finish with automotive undercoat spray
  • Lori installed all the cabinet doors with new hinges
  • Lori also put down the black linoleum under the sofa and dinette seat "boxes"
  • Fabricated a new doorway threshold using the aluminum from the shower stall
  • Fit the city water inlet to an existing opening on the street side
  • Cut an opening for the 120 volt electrical hookup receptacle
  • Purchased Pex tubing and Sharkbite fittings - and more - for the plumbing
  • Fabricated tail light backing plates to house the LED lights inside the OE Bargman lenses
  • Just bought a bunch of Jalousie windows, will be fabbing one into our entry door
  • Designing, measuring and scratching my head with regard to venting the refrigerator and toilet...
  •  


Here is how she looks with most of the paint removed and skin sanded


Looking at the area above the widow you see I've started polishing the strip I plan to leave aluminum exposed 

A lot of work over 10 months that is for sure!

Here is the strip of skin that will be left exposed - polished

Another view

Testing all the lights prior to attaching the last of the skin in the rear....they work perfectly

Here is the rear all buttoned up - cleaned  and ready for polish and paint

Polished, this old skin is quite oxidized , it looks shiny and nice but is not  show quality - still took a long time to do  too!


Here is the street side prior to sanding but having used the paint stripper on the area to be polished
Here is what I used for "cutting" with course grit polish, I used Nuvite Polishes from Perfect polish and they work great! My drill motor didn't survive..... 

Here is how the street side looks prior to paint - and there is the hardest working person I know! 

The Nuvite polish works great - I am still learning and will need to polish again; after I buy a new drill motor!

I think it's gonna look awesome with the paint!

Fixing dings and dents as we go....

My attempt to photograph the soldered wire splice in front

That mini torch was perfect for the job, soldering and heat shrinking

All 7 soldered and sealed with heat shrink wrap

The rear had multiple wires to splice

All done and ready ti use

I put one of these on each side of the trailer, I worked anti corrosion gel into the wires and also applied it to all the surfaces, finished them off with  battery terminal protective spray

Lori set up to apply shellac to the cabinet doors


Here is the interior after all her hard work, it looks so amazing!


The new and old wood blend together very well - color is pretty uniform

The area where the old furnace was located will be our liquor cabinet - we've been buying old bottles to  put on the shelves we will be installing in that area

Such a warm color  and love the sheen!

Martini shaker cabinet knobs...maybe a theme here