Okay we keep thinking we are near the end of the road.... it's just what I've been saying all along; everything takes way longer to do then we think that it will.
We have not been taking as many of the step by step photos as we were only because we have been working non stop to get it finished.
Here is a list of what we have been doing:
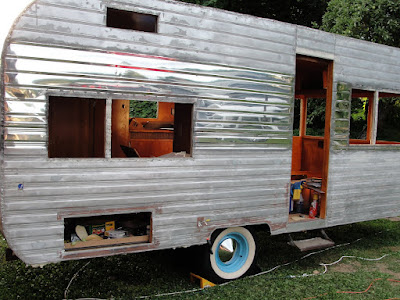
- Stripping and polishing the skin, scrubbing, using stripper and sanding each section
- Filling dents and dings
- Lori scrubbed the roof while I polished the skin, both dirty time consuming jobs
- Sealing and securing the skin, Vulkem sealer was liberally applied and we "stretched" the skin in places to make it fit, body work started using finishing type body filler, prime & paint soon!
- Paint is single stage automotive urethane, cream base to start, will be adding second color after windows are installed
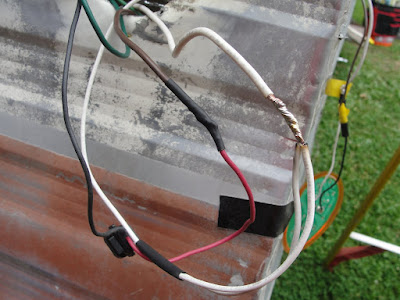
- Running all new 7 way wiring from front to back, new hangers for the loom, soldering and heat shrinking every connection, wiring all new LED lights, tail lights will be housed inside OE Bargman #99 lenses to look authentic, installed ground lugs for positive grounding
- Lori finished the whole interior shellacking, she is a great student and allowed me to show her how and did an amazing job - no surprise there!
- Fabricated a new door threshold out of the shower stall aluminum
- We've been filling all the gaps and spaces with spray foam insulation, will also use fiberglass resin on any exposed wood and finish with automotive undercoat spray
- Lori installed all the cabinet doors with new hinges
- Lori also put down the black linoleum under the sofa and dinette seat "boxes"
- Fabricated a new doorway threshold using the aluminum from the shower stall
- Fit the city water inlet to an existing opening on the street side
- Cut an opening for the 120 volt electrical hookup receptacle
- Purchased Pex tubing and Sharkbite fittings - and more - for the plumbing
- Fabricated tail light backing plates to house the LED lights inside the OE Bargman lenses
- Just bought a bunch of Jalousie windows, will be fabbing one into our entry door
- Designing, measuring and scratching my head with regard to venting the refrigerator and toilet...
-
 |
| Here is how she looks with most of the paint removed and skin sanded |
 |
| Looking at the area above the widow you see I've started polishing the strip I plan to leave aluminum exposed |
 |
| A lot of work over 10 months that is for sure! |
 |
| Here is the strip of skin that will be left exposed - polished |
 |
| Another view |
 |
| Testing all the lights prior to attaching the last of the skin in the rear....they work perfectly |
 |
| Here is the rear all buttoned up - cleaned and ready for polish and paint |
 |
| Polished, this old skin is quite oxidized , it looks shiny and nice but is not show quality - still took a long time to do too! |
 |
| Here is the street side prior to sanding but having used the paint stripper on the area to be polished |
 |
| Here is what I used for "cutting" with course grit polish, I used Nuvite Polishes from Perfect polish and they work great! My drill motor didn't survive..... |
 |
| Here is how the street side looks prior to paint - and there is the hardest working person I know! |
 |
| The Nuvite polish works great - I am still learning and will need to polish again; after I buy a new drill motor! |
 |
| I think it's gonna look awesome with the paint! |
 |
| Fixing dings and dents as we go.... |


No comments:
Post a Comment